Laravel MySQL Connection Explained with Basic Auth

Hi, Friends welcome to TechBlog. In this tutorial, we are going to config the MySQL Database connection with your Laravel Application. In continuation Laravel tutorial Series we had installed Laravel with an apache web server in the previous tutorial.
Prerequisites you needed to build Database connectivity with laravel application:
- Ubuntu with LAMP/LNMP
- Laravel 8.x
Major Steps of Laravel MySQL Connection:
- Step1-Install MySQL server and PHP MySQL module.
- Step2-Creating User and Database for your application
- Step3-Making auth functionality.
- Step4-Config your application with database information and test the connection.
Step1-Install MySQL server and PHP MySQL module.
You need a MySQL server and php-mysql module. Go ahead and execute following command
sudo apt install mysql-server, php-mysql
After installation completed check the mysql service running or not by using
service mysql status
Yea it’s running. If you found it’s not running then start the service.
sudo systemctl start mysql
Now run the MySQL secure installation script to improve the security of your database and remove unwanted database and users that comes with by default.
sudo mysql_secure_installation
Here I am going to choose the medium strength password and set the password. Then re-enter the password again. Accept it. And follow the question and answer it.
Step2-Creating User and Database for your application.
Now move into MySQL database and create a database for your application. and create a user for your application, use the following command.
sudo mysql
CREATE DATABASE techblog;
CREATE USER 'techblog'@'localhost' IDENTIFIED BY 'Techblog@2020';
GRANT ALL PRIVILEGES ON *.* TO 'techblog'@'localhost' ;
FLUSH PRIVILEGES;
EXIT;
![]() And make sure to change username password as per yours. After that flush the privilege. Now exit from MySQL prompt by typing exit command.
And make sure to change username password as per yours. After that flush the privilege. Now exit from MySQL prompt by typing exit command.
Step3-Making auth functionality.
Move to your application directory. Here we are going to create basic authentication functionality like login and register users to show database connectivity.For that we required UI library just type following command:
cd /home/techblog/myapp1
composer require Laravel/ui
![]() Now install auth functionality to your application, here I am going to use vue js framework for front end. So you can choose angular, react also
Now install auth functionality to your application, here I am going to use vue js framework for front end. So you can choose angular, react also
php artisan ui vue --auth
You can see that authentication scaffolding generated. Also, you need to run the npm install and run dev in order to make it fully functional with compiling all js and CSS files. Npm stands for Node package manager It puts modules in place so that node can find them, and manages dependency conflicts intelligently. If npm not installed in your system then first install npm:
sudo apt install npm
Just go ahead and type npm install. It will install all required dependency script automatically.
npm install
After that use npm run dev command to compile all js and css file for your application.
npm run dev
Step4-Config your application with database information and test the connection.
So, in order to do this, open your application directory with any code editor. I am using Visual Studio Code to edit my application. You can check out this tutorial how to install Visual studio code on ubuntu here. Open your application directory inside the code editor. And then edit the “.env” file inside your application. Find the DB connection section. And put your database name, user name, and credentials. And then save the file.
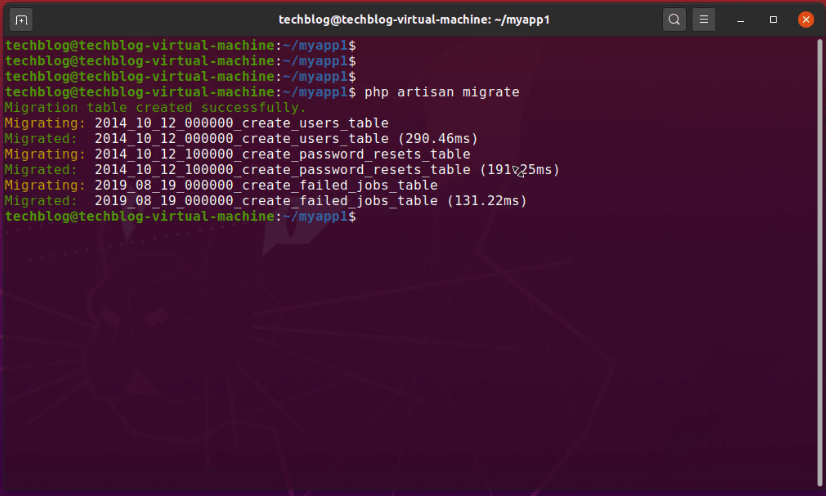
Get back to the terminal and try to migrate the tables which we created at the time of creating auth functionality. Migrate the tables to database using following command
php artisan migrate
 You can see inside MySQL database just open MySQL prompt open up your database and then show tables. Here you can see the database schema successfully migrated.
Test Laravel MySQL Connection
Now you can see the reflection on your application. Get back to the browser reload the page and here it is, log in and register functionality added to your application. Well, now you can able register yourself inside your new application just fill this form and click on the register button.
 Also, you can see the routs directory open up web routs the auth routs registered automatedly.
 Hope this tutorial helpful to you. Leave a comment if you have any questions. Also, click on the subscribe button to encourage us and get the latest update. Thank you.
